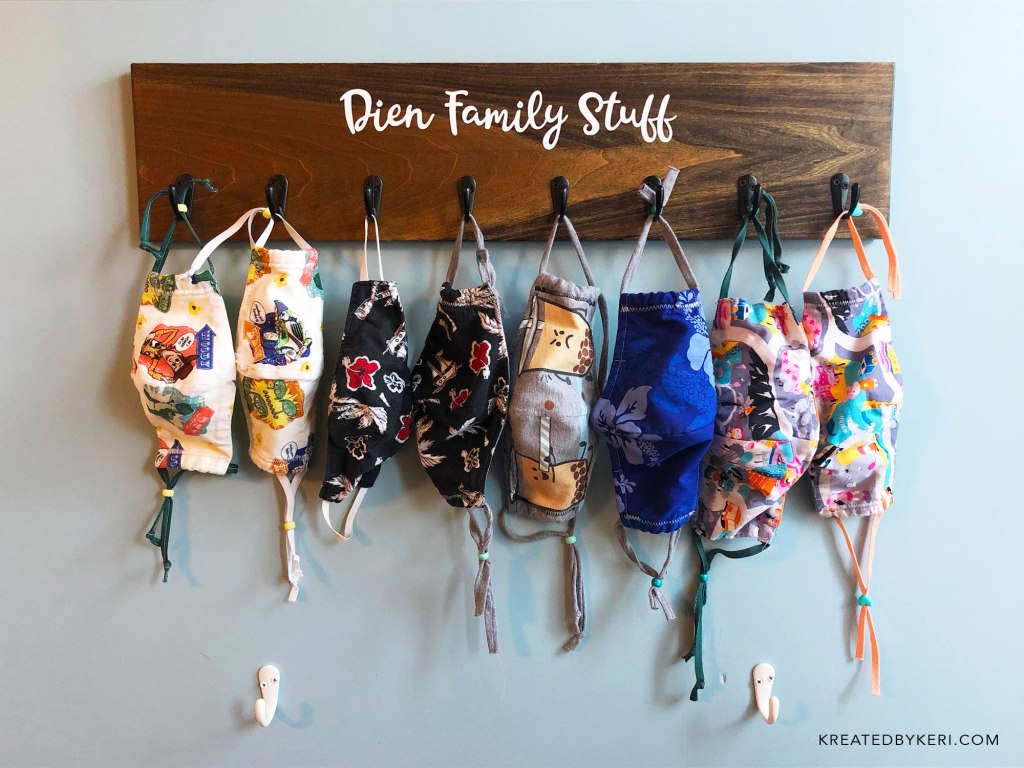
Back in May I used some scrap wood from my dad to make a mask holder. Using some left over stain I had from a home project a few years ago, some cheap hooks from amazon, and my Cricut machine, I made this holder to go by the door to keep our face masks readily available before going out.
I think a few people thought it was a weird idea, but here we are, 9 months later, and needing to wear a mask anytime we step outside our homes. It really helps to have one place to keep them all (like a shoe rack).
If you want to make your own, here’s what you’ll need:
Some of the links below are affiliate links. That means if you click on them and buy the item, I get a small commission at no extra cost to you. This helps offset the cost of running this blog.
MATERIALS:
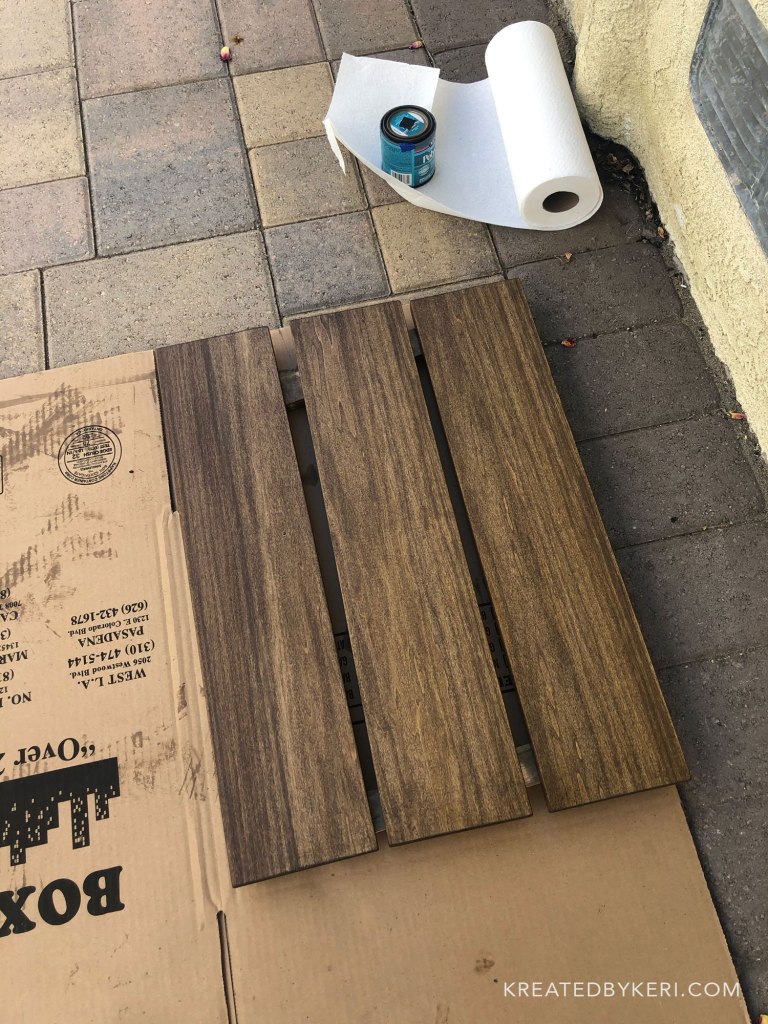
1. 1×6″ wood board (the one I had was poplar, but Home Depot also sells oak and pine).
2. Wood stain (I used dark walnut)
3. Minwax Polycrylic Protective Finish, satin finish
4. Set of small robe hooks
6. Command strips for frames: I always buy the “heavy duty ones” because I never know if I’ll use it for a large or small hanging, and I like to have the extra insurance that whatever it is won’t fall off the wall.
STEPS:
First, cut the board to size–I made mine 24″ wide. You can make it wider or narrower depending on the number of hooks you want to put on. Next, stain the board. I did two coats to get a darker finish.
Next, seal the board with 2-3 coats of the polycrylic and let it dry at least a few hours, if not over night. When it’s dry, screw in your hooks and transfer your Cricut vinyl cutout to the board.
Lastly, apply the Command strips to the back of the mask hanger and the wall (follow the directions on the packaging).

Leave a comment