Some of the links in this post are affiliate links. This means if you click on the link and purchase the item, I will receive an affiliate commission at no extra cost to you. All opinions remain my own.
Back in early May when trying to find hand sanitizer or nitrile gloves online was like searching for gold, I decided I needed an alternative way keep my hands clean anytime I needed to go out. And amongst the glut of articles pertaining to COVID-19 spread were ones about being wary of public bathrooms. Public bathrooms already grossed me out anyway, so if I didn’t have to enter one ever again, I’d be just fine.
I searched online for some DIY portable hand washing stations and while many were great, I couldn’t find any examples where you 1) could keep it in the car without it falling over during driving; 2) would not need to use any batteries/electricity; 3) could store the dirty water in a container for later disposal (cuz not every place you’d use the sink would be keen on you dumping the used soapy water there); and a bonus feature 4) It was made of parts that had dual purposes so when we didn’t need the hand washing station, we could still use its parts for other things.
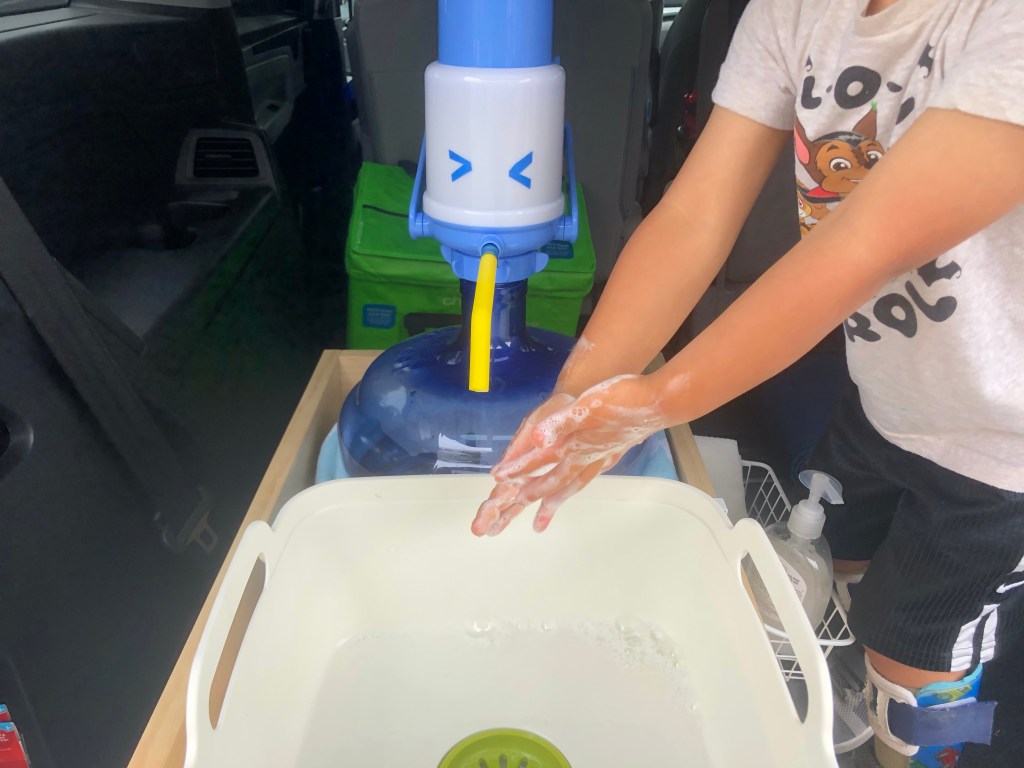
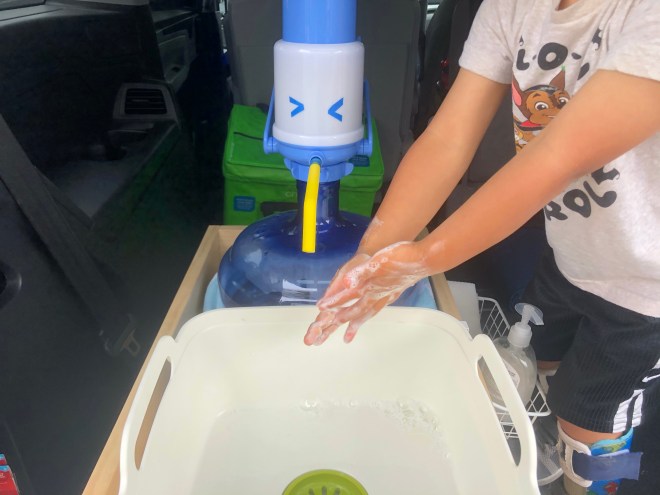
I came up with the idea of using a drinking dispenser with some sort of manual pump that you could operate without using your dirty hands. After exhausting the idea of using a foot pump, I stumbled upon attachments that could be screwed on to a 5 gallon water jug and manually pumped. After I found the Primo Water Pump and Primo water jug and built the rest of the portable sink around those two things. The pump can easily be pushed with your elbow so you don’t have to use your hands.
I decided to use the Primo brand because I was able to get a 5 gallon Primo bottle from Office Depot curbside pick up and didn’t want to have to wonder if the other brands of water pumps on Amazon that said “fits most 5 gallon jugs” would actually fit. Figured if I bought the brand of bottle that the pump was designed for, I could avoid the hassle of returning any items.
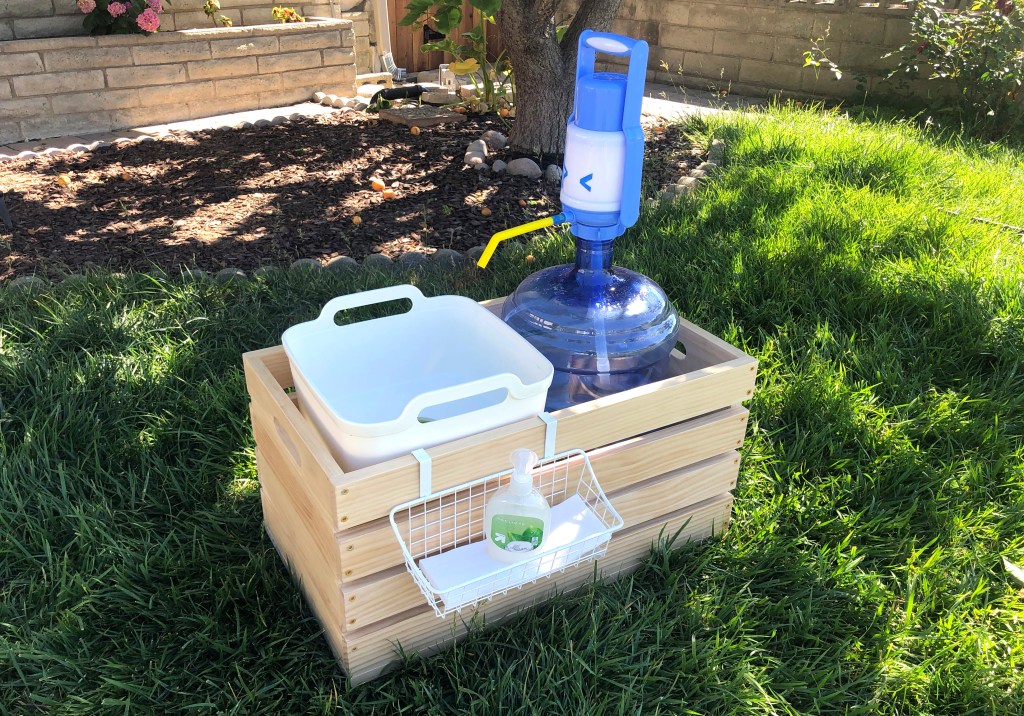
Here are all of the parts needed to build your own portable hand washing station. Some of them are affiliate links which means I get a small commission if you click and buy through it!
MATERIALS
- Primo 5 Gallon Water Jug
- Primo – Portable Bottle Pump Water Dispenser – For 3 or 5 Gallon Jugs
- Joseph Joseph Wash and Drain Dish Tub (Don’t skimp on this. I did lots of research and trial and error with other regular bins and this one is the best. Drainage is excellent and it’s very sturdy.)
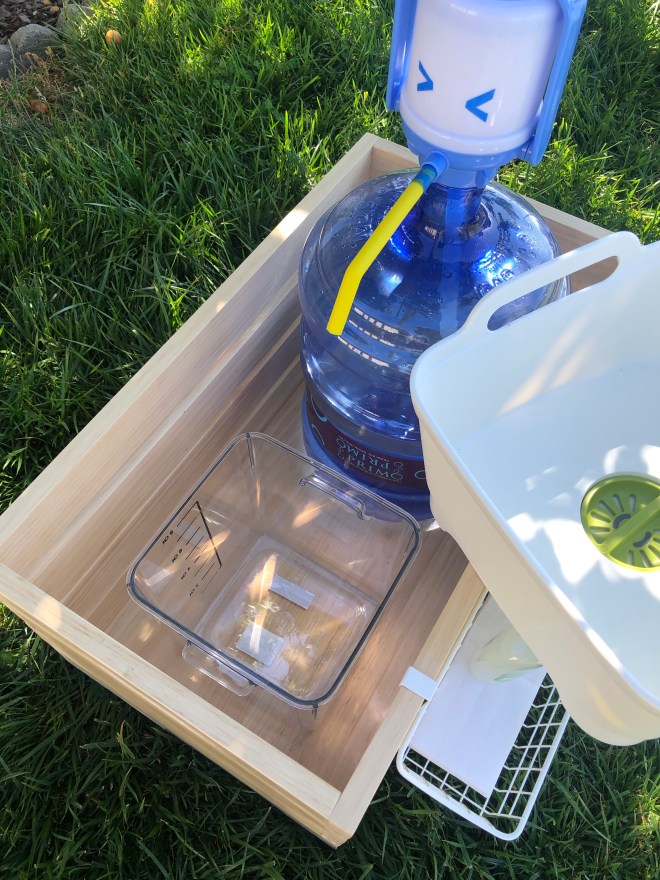
- Rubbermaid 8qt Square Food Storage (make sure it’s the 8qt. I tried the 12 and it didn’t fit under the sink bin)
- Rubbermaid Small Lid for 2,4,6, and 8 qt Square Food Storage
- Spectrum Diversified Grid Storage Basket (optional)
- Thick silicone straw with a bend (not the standard straw width, but one that is about .45″ or .55″ wide). This is optional, but beneficial.
That’s all you actually need, however if you’re going to be driving around you’re going to want to have a crate to contain it your car. I searched the internet high and low for a pre-made crate that would fit everything without too much wiggle room, and couldn’t find one that I liked. So I solicited my husband to make me a custom one from some Home Depot wood. At the bottom of this post are instructions on how to make the crate if you so desire.
Here is a video I made that shows the DIY portable hand-washing station in action:
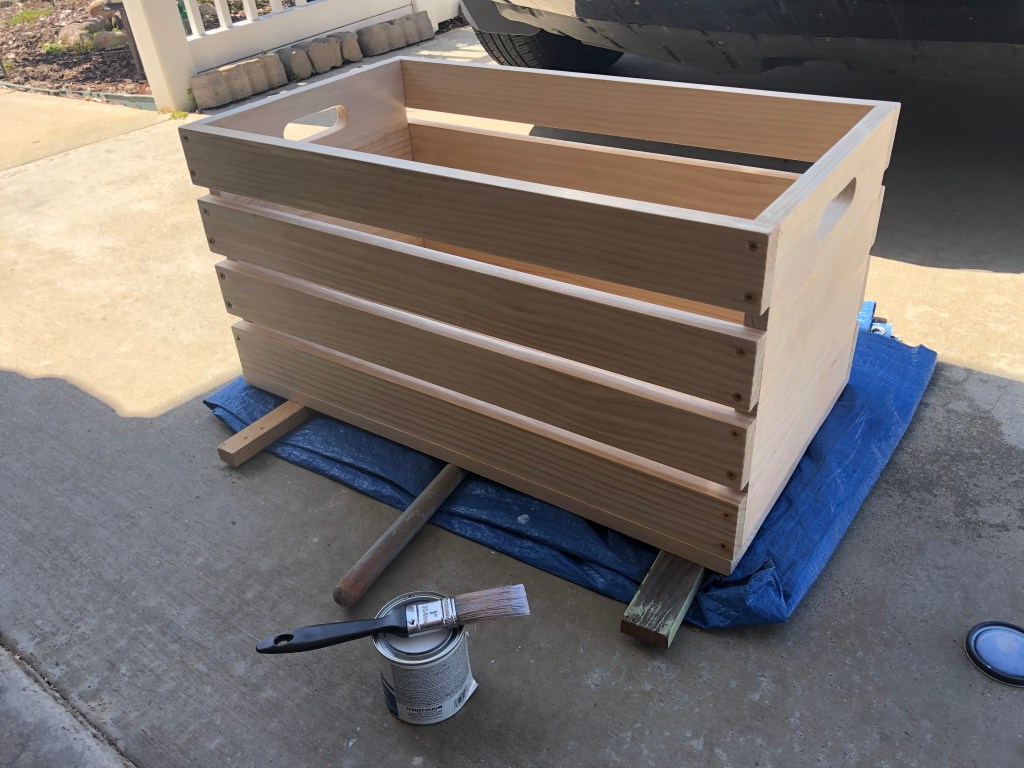
THE CRATE
While the crate isn’t completely necessary, if you plan on using this set up in a vehicle, you’ll need one if you don’t want the jug to fall over when you slam on your brakes. But maybe you’re a better driver than me and can glide to a stop without it moving at all.
If you can find a box or crate pre-made, great! You’ll need one with an interior length of at least 22″, interior width of at least 12″ and a height of about 11-13″. I couldn’t find one online that I liked so I summoned my husband to make one from pine boards from Home Depot.
For those who want to build their own crate, here are the materials you’ll need and instructions for putting it together:
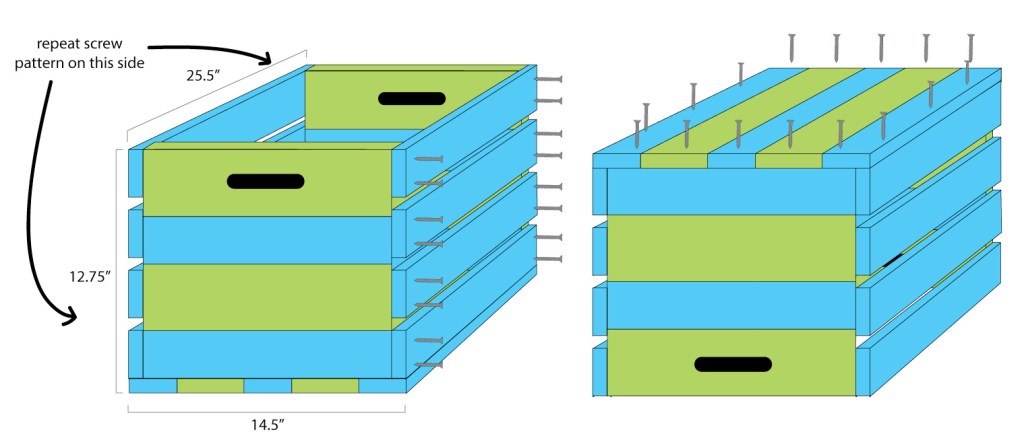
CRATE MATERIALS
1×4 pine boards (2 pieces that are 25.5″ in length AND 4 pieces that are 13″ in length)
1×3 pine boards (11 pieces that are 25.5″ in length AND 4 pieces that are 13″ in length)
Wood screws (1.25″ or 1.5″)
Minwax Polycrylic Protective Finish (I used clear satin but it also comes in gloss and semi-gloss)
Jigsaw
Clamps
CRATE INSTRUCTIONS
1. Watch this video by Steve Ramsey on how to build a basic crate. Jerod followed most of his technique except I wanted a solid base on the crate so he modified it.
2. Cut all your pieces and glue the boards together for the base and the 2 sides with the handles. After they are glued, sand the faces down so they are even and don’t have any glue remnants on the surface.


3. Using a jigsaw, cut out the handles. Ours are about 1″x4″.
4. Assemble your crate by gluing and screwing the side slats to the sides with the handles and also to the base.

5. Sand everything down (especially the edges) and wipe the dust off well using a tack cloth.
6. If desired, add 2-3 coats of Polycrylic coating and let dry overnight before putting anything in the crate.

Leave a comment